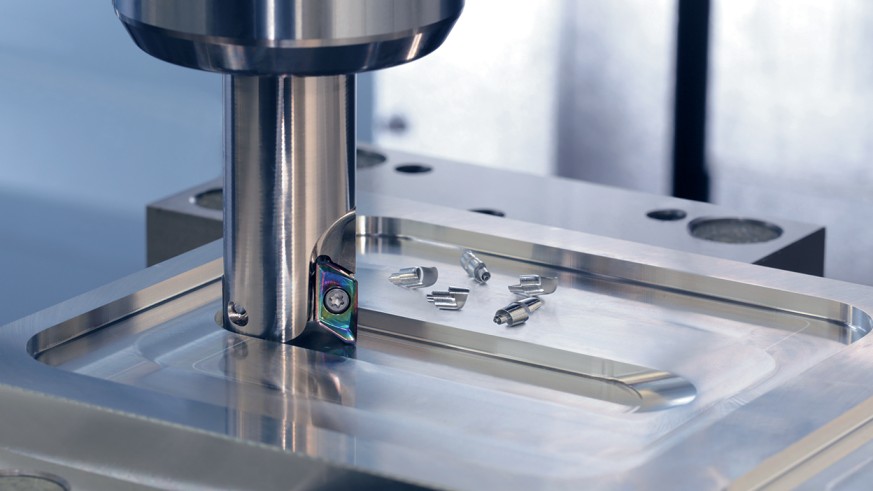
High-precision machining solutions comprise the top end of the subtractive manufacturing, where dimensional tolerances are specified in micron range and surfaces are near optical. The solutions are outside the limits of the conventional CNC machining, embracing advanced process controls, specialized equipment, and strict metrology to deliver the accuracies that the standard machining cannot always provide.
The main distinction between the conventional and high-precision machining solutions lies in three key points. The capability of measurement (sub-micron resolution), environment control (temperature-controlled to ±0.5°C), and process validation (statistical process control with CpK >1.67). In real world applications, this translates into, say, aerospace fuel nozzles to ±0.0002” orifice tolerances or medical implants with surface textures held to 5µm for best bone ingrowth.
Industries that depend on these solutions include:
● Medical device manufacturers requiring biocompatible surfaces
● Aerospace companies producing flight-critical components
● Semiconductor firms needing ultra-flat wafer chucks
● Optical engineering teams creating telescope mirrors with λ/20 surface accuracy
Core Technologies Behind High-Precision Machining
The basis of the high-precision machining is formed by three technological pillars. First, the ultra-precision CNC machines with linear motor drives allow to get positioning accuracy below 0.1 µm, whereas for rotation, air-bearing spindles prevent friction-induced errors. Such systems usually include real-time thermal compensation against machine expansion during prolonged periods of production.
Second, advanced verification backbone of metrology systems are used. The white-light interferometers measure the surface topography with a 1nm resolution, while micro-CMMs with ruby tipped probes check internal features to an accuracy of 0.5µm. The most modern facilities use X-ray computed tomography for a non-destructive inspection of the internal geometry not seen with a conventional probe.
Third, such tolerances are made possible by cutting-edge tooling solutions. Single-crystal diamond tools leave the mirror finish on non-ferrous materials; ultrasonic-assisted milling does not create microcracks in brittle ceramics. For superalloys, nano-grained carbide end mills with customised coatings, are immune to the high temperatures developed during machining.
Applications of High-Precision Machining Solutions
In making medical device, high precision machining produces life sparing parts with minute specifications. Spinal implants have specially machined porous surfaces (20-50µm pore size) for bone ingrowth and as surgical robot components, the bearing surfaces should be less than <0.1µm Ra roughness to operate without particle generation for a decade.
The aerospace industry tests these solutions to the brim. Turbine blades use intricate cooling channels held to ±0.0005”, but satellite assemblies routinely divide dissimilar materials, such as invar and beryllium, with thermal expansion coefficients tuned to a nanometer’s precision. Guidance system housing must be able to withstand 0.1µm alignment stability despite subjecting the material to extreme G-force.
Automotive uses require high precision in developments and especially when manufacturing electric vehicles. Cooling plates for batteries must have flatness to 0.01mm/m² to provide maximum heat transfer whereas the diameter of orifices for fuel injector nozzles must be precise to an order of magnitude of 0.8µm for millions of units. The transmission components enjoy the high-precision profiles (gear tooth) which minimizes noise and enhances efficiency.
Benefits of High-Precision Machining Solutions
The main advantage of high-precision machining is the possibility to produce components with more strict requirements to performance. In terms of practicality of the application, this means the fuel injectors boosting the efficiency of the engine by 3%, or medical implants that cut the post-operative infections by 40% due to optimized texture of the surface.
From a manufacturing standpoint, these solutions offer:
● Reduced scrap rates through in-process monitoring and adaptive control
● Longer tool life via optimized cutting parameters and thermal management
● Faster time-to-market by eliminating secondary finishing operations
● Improved repeatability through digital process documentation
As far as finances are concerned, the benefits accumulate as the volumes of their productions increase. A single aerospace manufacturer who switched to high-precision solutions decreased the overall cost of a single part by 22% because of a lower rate of rejection and a minimised assembly time. When using components with fully documented high-precision manufacturing processes, medical device companies record 30% less FDA approval cycles.
How to Implement High-Precision Machining in Your Workflow
Implementing high-precision machining begins with Design for Manufacturing (DFM) optimization. Engineers should consider:
● Tolerance stacking – Only mission-critical features should carry sub-0.005mm tolerances
● Material selection – Free-machining alloys like 303 stainless reduce cycle times by 25% versus 304
● Feature accessibility – Internal corners require specialized tooling below 0.3mm radius
Material preparation protocols make the difference between success and failure:
1. Certified stock – Mill test reports verifying hardness and grain structure
2. Stress relief – Thermal treatment before machining for dimensionally stable parts
3. Proper fixturing – Vacuum chucks or custom mandrels for thin-walled components
When partnering with suppliers, require:
● Process validation reports showing CpK >1.33 for critical dimensions
● First-article inspection with full GD&T verification
● Material traceability from raw stock to finished part
Choosing the Best High-Precision Machining Partner
Technical Evaluation Checklist:
● Equipment – 5-axis mills with <0.5µm positioning accuracy
● Metrology – ISO 17025 accredited lab on-site
● Environment – Temperature control ±1°C, vibration isolation
Supplier Interview Questions:
1. “What’s your typical process capability for ±0.005mm features?”
2. “Show me a corrective action report from a tolerance violation”
3. “How do you handle thermal compensation during long cycles?”
Future Trends in High-Precision Machining
AI Integration
● Adaptive control systems adjusting feeds/speeds in real-time
● Predictive maintenance reducing unplanned downtime by 40%
● Computer vision for automated defect detection
Hybrid Manufacturing
● Laser deposition building near-net shapes
● Precision grinding achieving 0.05µm finishes
● ECM creating burr-free micro-features
Sustainability Advances
● Cryogenic machining eliminating coolant waste
● Toolpath optimization reducing energy use 15-20%
● Closed-loop recycling achieving 95% material utilization
Why High-Precision Machining Solutions Are Essential
The medical device industry presents a strong case – knee implants with below 5µm smoothness impart 30% more attachment: bones (osseointegration) as compared to stand-alone finishes. In aerospace, machined fuel nozzles with 0.8µm orifice consistency benefit combustion efficiency by 2.5%, with millions saved yearly in fleet fuel-costs.
Implementation Roadmap:
1. Audit current components – Identify 3-5 critical parts for upgrade
2. Run capability studies – Compare existing vs. high-precision processes
3. Pilot project – Test with non-critical component
4. Full implementation – Scale across product line
Financial Justification:
● 18-24 month ROI typical
● 35-50% warranty cost reduction
● 15-20% assembly time savings
Keen on transitioning manufacturers can take the first step by asking their potential partners for process capability studies (actual data regarding their capacity to hold your tolerances consistently). This data-based strategy guarantees successful high-precision machining solutions introduction.


